Wonder if You Might be Gluten Intolerant?

Screen Shot 2013-04-08 at 12.59.45 PMIf you eat in restaurants, have kids, watch the news or shop in a grocery store, chances are you’ve been hearing a lot about gluten-free foods and diets. If you’ve ever thought “Why are these people eating this way?” Or, “I wonder if I’m gluten-intolerant”? You may want to checkout the below list of 10 common symptoms (there are many more) and see if it might apply to you.


1. Digestive issues such as gas, bloating, diarrhea and even constipation. I see the constipation particularly in children after eating gluten.

2. Keratosis Pilaris, (also known as ‘chicken skin’ on the back of your arms). This tends be as a result of a fatty acid deficiency and vitamin A deficiency secondary to fat-malabsorption caused by gluten damaging the gut.

3. Fatigue, brain fog or feeling tired after eating a meal that contains gluten.

4. Diagnosis of an autoimmune disease such as Hashimoto’s thyroiditis, Rheumatoid arthritis, Ulcerative colitis, Lupus, Psoriasis, Scleroderma or Multiple sclerosis.

5. Neurologic symptoms such as dizziness or feeling of being off balance.

6. Hormone imbalances such as PMS, PCOS or unexplained infertility.

7. Migraine headaches.

8. Diagnosis of chronic fatigue or fibromyalgia. These diagnoses simply indicate your conventional doctor cannot pin point the cause of your fatigue or pain.

9. Inflammation, swelling or pain in your joints such as fingers, knees or hips.

10. Mood issues such as anxiety, depression, mood swings and ADD.

For more information, or to find out about an easy (and free) to know for sure, visit our friends at Eat Local Grown.

Sometimes You Feel Like a Nut, Sometimes You Don’t!

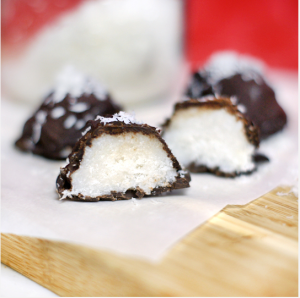
Screen Shot 2013-02-01 at 9.12.31 PMThank you to my niece, Caileigh, for sharing these on her Facebook page from Detoxinista . I absolutely LOVE chocolate and coconut and especially having them together! These look easy, delicious and are not too bad for you. The top three, in my book! I wish I had some chocolate chips right now so I could make them, but sadly, I can’t keep them in the house because I will eat them straight from the bag :-(.  Enjoy yours with or without an almond on top,  depending on whether or not you feel like a nut!

Mounds Bar Truffles
makes 8 pieces

Ingredients:

1/2 cup unsweetened shredded coconut
2 tablespoons coconut oil
1 tablespoon honey
1 tablespoon water
1/4 teaspoon vanilla extract
pinch of fine sea salt
1/2 cup dark chocolate chips (You can also substitute  carob chips)

Directions:

In a medium bowl, combine the shredded coconut, coconut oil, honey, water, vanilla and salt, and mix well. Allow the mixture to rest for 5-10 minutes, so that the dried coconut will absorb some of the moisture.

Using a tablespoon or cookie scoop, drop the coconut mixture onto a plate lined with parchment paper, creating bite-sized mounds. (The mounds will be fragile at this point, but will firm up soon!)


Cinnamon Crumble Cake – Gluten-Sugar-Dairy Free!

Screen Shot 2013-01-29 at 10.44.55 AMThank you Sugar-free Mom for sharing this! Who says you can’t have anything delicious if you have dietary restrictions. This looks great for anyone, especially those with overnight guests who are picky eaters!

Ingredients:

  • 6 eggs
  • 1/2 cup egg whites
  • 1 (13.5 ounce) can light coconut milk
  • 2 teaspoons ground cinnamon
  • 2 teaspoons liquid vanilla stevia
  • 2 teaspoons vanilla extract
  • 2 tablespoons ground flax seed
  • 5 cups or 10 slices cubed Gluten Free bread ( I used Udi’s Omega Flax & fiber)

Cinnamon Crumble

  • 1 cup quick oats
  • 1 cup shredded unsweetened coconut
  • 2 teaspoons ground cinnamon
  • 1 teaspoon salt
  • 1 teaspoon ground cloves
  • 2 teaspoons vanilla extract
  • 1/4 cup honey
  • 1/4 cup coconut oil, melted

Directions

Preheat oven to 350 degrees (if cooking right away). Whisk together all ingredients except bread and crumble topping. Spray a baking dish with cooking spray. Place bread into dish, pour egg mixture over bread. In a large bowl, stir together topping ingredients. Sprinkle cinnamon crumble topping over top. Refrigerate overnight and bake in the morning or bake immediately. Bake uncovered for a good 45-50 minutes until center is not visibly liquidy. Serve with fresh berries and honey if desired.

Tuna Cakes

This recipe is perfect for those nights you get home late and have no fresh meat thawed out in the fridge for a good dinner, and it’s Paleo-friendly.

Tuna Cakes

1 can good quality tuna (Wild Planet)
1 egg
1 medium carrot, diced
1 tbsp parsley, chopped finely
1 tbsp almond flour
1 tbsp coconut flour
1 tbsp lemon juice
1 tsp mustard (I used honey mustard)
½ tsp garlic powder
½ tsp onion powder
Pinch cayenne powder
Salt and pepper to taste

·         Mix together all ingredients in a large bowl until well combined.  Form mixture into 2 patties.

·         Heat oil over medium-high heat and cook the patties for about 3 minutes on each side, until golden brown. Flip carefully to avoid breaking them. Serve immediately.

·         Sauce (optional): Mayonnaise, mustard, sriracha

Passage Foods Sauces – 2 Thumbs UP!

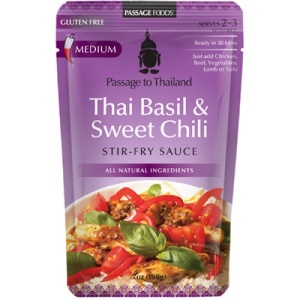
4556I received a package of sauces from Passage Foods to taste and review. They manufacturer international cooking sauces and aim to let people indulge in exotic flavors and aromas at home. All their  products are gluten free, and provide a healthy solution for people with busy schedules. Each package contains the premixed sauce and instructions (type of meat/veggies) to make a recipe.

My absolute favorite has to be the Thai Basil and Sweet Chili sauce! I was definitely surprised at how fresh the basil tasted, and loved the slight kick of the chili at the end. Each of the other sauces I tried were rated ‘mild’ and had more of a sweet note at the end. There is a good variety of flavor options and spice levels for everyone in a household. Though I followed the recipes on the back of the package the first time I made them, I was getting ideas as I ate my dinners for other delicious dishes to incorporate the sauces in.

I HIGHLY recommend these sauces to anyone looking for a healthy alternative to quick meals. So many of us are super busy and rushed and find it hard to find time to prepare a restaurant-tasting meal.  I could eat them daily over all different types of things, and they’re even great with just vegetables for vegetarians. These were very easy to prepare and tasted amazing, not to mention making my apartment smell delicious as well. I am looking forward to trying additional flavors!

Where to buy Passage Foods Products

Make Your Own Delicious Little Fishes!

I saw these cute little vegan fishy crackers on Chef Chloe’s site. They look easy to make and can be converted to Gluten-free version as well!

Screen Shot 2013-01-23 at 8.06.23 PMIngredients

  • 1 cup all-purpose flour, plus extra for work surface
  • 2 tablespoons nutritional yeast
  • ¼ teaspoon onion powder
  • 1/8 teaspoon turmeric
  • 1 teaspoon sea salt
  • ½ teaspoon ground black pepper (optional, but recommended for adults)
  • 5 tablespoons vegan margarine
  • 3 tablespoons cold water

Procedure

Preheat the oven to 375 degrees F.

In a food processor, combine flour, nutritional yeast, salt, onion powder, and turmeric. Process until combined. Add margarine, and pulse about 15 times until crumbly. Add water and process until mixture just comes together.

On a lightly floured work surface, roll out the dough until it is 1/8-inch thick. It will be easier to roll if you work with half of the dough at a time. Using a goldfish cookie cutter, or other small cookie cutter, cut out the fish and line then on a baking sheet. If desired, carve a face, as pictured. I used the prong of a fork for the eyeball and a toothpick for the smile. Bake for 12 to 15 minutes until golden and very lightly browned. Let cool and store at room temperature in a tightly sealed container or bag.

Easy “Cheesy” Kale Chips!

One of the products we both loved from the show were “cheesy” kale chips. Cheesy, in quotes, because they are dairy-free. And, gluten, soy and nut-free. AND, they are organic and raw! They only draw back is that they are expensive! So, I went to me favorite gourmet natural chef, Lisa Stimmer, and asked her for a recipe to duplicate them. She was back to me within the hour with the below. I made them that night and they were FABULOUS!Image

Ingredients:


  • 1 large bunch curly kale (12-16 oz.) stems removed
  • 1 cup cashews (soaked for a couple hours)
  • 1 red bell pepper, deseeded
  • 2 tablespoons lemon juice (half a lemon)
  • 1/3 cup nutritional yeast
  • 1 ½ teaspoon sea salt (or to taste)
  • Dash of cayenne pepper ( or to taste –spicy)

Directions:

  1. Remove the toughest parts of the kale stems (save them for a green smoothie, green juice, or add them to a stir-fry!), and tear the leaves into bite-size pieces.
  2. Wash them by submerging them in a bowl of water while lightly swishing them around with your hands so any debris can float to the top, drain them, and dry them in a salad spinner!
  3. Place kale pieces in a large bowl (you want enough room so that you can mix the coating in later without having to deal with leaves falling out of the bowl!)

To make the cheesy coating:

  1. Combine soaked cashews, bell pepper, lemon juice, nutritional yeast and sea salt in a blender or food processor (a high-speed blender like the Vitamix is best), and run for a minute or two until smooth.
  2. Add the cheesy coating to your bowl of kale and massage it in with your hands. Don’t worry too much about uneven distribution, as the big globs taste delicious in the final product!
  3. For raw kale chips (my method of choice, as they will retain the nutrients and enzymes of all the healthful ingredients!): place on dehydrator screens and dehydrate at 115 degrees until crispy. The time will vary but make sure ALL the moisture is gone and they are genuinely crunchy.
  4. Alternatively (if you don’t have a dehydrator), spread kale pieces on parchment paper on baking trays, and bake at 200 degrees until crispy, about 45 minutes (but again, all that matters is that they MUST be crunchy).

Thai Meatballs With Red Curry & Coconut Milk

This picture doesn’t do these justice, but trust me, they are DELICIOUS! I used grass-fed beef for mine, but you could easily substitute ground turkey, chicken or tofu. The original recipe calls for brown sugar, but I used a tiny bit of maple syrup instead. And it suggests serving over rice, but I served mine over steamed veggies.  The sauce is so good, you can serve them over anything!

Recipe Ingredients:

  • 1 pound ground beef (or turkey, chicken, tofu)
  • 2 cloves of garlic
  • 2 tablespoons soy sauce (gluten-free)
  • 1/4 cup of cilantro
  • 1 tablespoon fish sauce (gluten-free)
  • 1/4 teaspoon black pepper
  • 4 tablespoons red curry paste
  • 1 1/2 cups coconut milk (canned – not diluted)
  • 1 tablespoon fish sauce
  • 3 tablespoons brown sugar (or 1 tbsp. syrup)
  • cooked rice (optional)

Recipe Steps:

  • To make the meatballs, combine beef, garlic, cilantro root, fish sauce, black pepper, and soy sauce in a medium bowl. Thoroughly mix together the ingredients. Shape the beef mixture into 1-inch balls (makes about 10-12 meatballs).
  • In a medium sauce pan, fry up the red curry paste for 2 minutes until fragrant.
  • Stir in the coconut milk, fish sauce and brown sugar.
  • Drop in the meatballs into the curry broth and bring to a boil. Boil the meatballs for 10 minutes and reduce to medium high heat. When the meatballs are on medium high heat, let the curry sauce reduce down for about another 5-8 minutes.
  • Serve the Thai meatballs in red curry sauce with rice.

Quinoa Pizza Bites Recipe

1 cup uncooked quinoa
2 large eggs
1 cup chopped onion
1 cup shredded mozzarella cheese
2 teaspoons minced garlic
1/2 cup fresh basil, chopped (or 2 tablespoons dried)
1/2 cup cherry tomatoes, diced
1/2 teaspoon salt
1 teaspoon paprika
1 teaspoon dried oregano
Pizza sauce for dipping
**Add cooked ground turkey to make non-vegetarian

Cook quinoa. Preheat oven to 350 degrees.

Mix together all ingredients, except pizza sauce, in a medium mixing bowl.

Distribute mixture into a greased mini muffin tin, filling each cup to the top (one heaping tablespoon each), and press down gently to compact.

Bake for 15 to 20 minutes. Cool for 10 minutes before removing from the pan. Serve warm with sauce for dipping.

Real Jello – Sugar-free & No Artifical Ingredients!

I am ALWAYS trying to find healthier versions of desserts and here’s one I especially like. It’s home made jello without the artificial colors, preservatives, and sugar. I follow the below recipe from The Splendid Table, but instead of using fruit juice which is high in sugar, I add flavored stevia drops, (my favorite is grape) and skip the additional sweetener. You just don’t seem to need it with the stevia. But remember all stevia is NOT the same – look for organic with NO added dextrose or other ingredients. Bedsides being bad for you, it tastes bitter. SweetLeaf is the one we recommend.

Full disclosure: It will be clear and not be purple and that’s a little weird initially. I experience the same thing with my root beer (root beer stevia drops and seltzer water), but you get used to it 🙂

Ingredients
  • 2 cups fresh or good-quality bottled fruit juice or puree
  • 1 envelope (1/4 ounce) unflavored gelatin
  • 2 to 3 teaspoons fresh lemon juice (optional)
  • Sugar, honey, maple syrup, or fructose to taste (optional)
Directions
  • 1. Pour 1/2 cup of the fruit juice into a medium glass bowl or measuring cup and sprinkle the gelatin over it. Let stand for 1 minute.
  • 2. In a medium saucepan, bring the remaining 1-1/2 cups fruit juice to a boil. Stir into the gelatin mixture until dissolved. Add the lemon juice and sweetener to taste, if desired. Pour into individual bowls or into one bowl. Let cool, then refrigerate for several hours, until set. You can prepare the “Jell-O” up to 5 days ahead.